
The Joy Of Clips And Canva
Photo Editing With My iPhone

I am completely amazed at the evolution of photo editing. How we alter photos have gotten easier and easier and easier. Now, it has gotten so easy that my 9 (almost 10) year old son can do it. The technology we have to edit almost everything under the sun is absolutely mind-blowing. Back in the 1980’s, I had no clue what photo editing was. In the 1990’s, I knew about photo editing, but I thought it was one of the most complicated projects to complete. At the time, I assumed that only professionals as smart as Albert Einstein can only perform this task. By the time we entered the 21st Century, I became very aware that anyone can edit photos or photoshop. However, the tools I had made the process very time consuming for me. Now that smartphones are extremely popular, and there are many apps to choose from, I can now edit photos in as little as five minutes – depending on how I want my photos to look at the end.
In this day and age, photo editing can be used for a lot of things. Photo editing can be used for changing the setting from day to night. It can be used for giving your image a magical appearance like adding a unicorn flying over a rainbow in the background or adding colorful fairies in a starry, dark sky. It can be used for changing the body image of a person. It can even be used for removing your ex-husband (or wife) from the picture – which is probably the most popular one. The ideas of reworking a photo are endless.
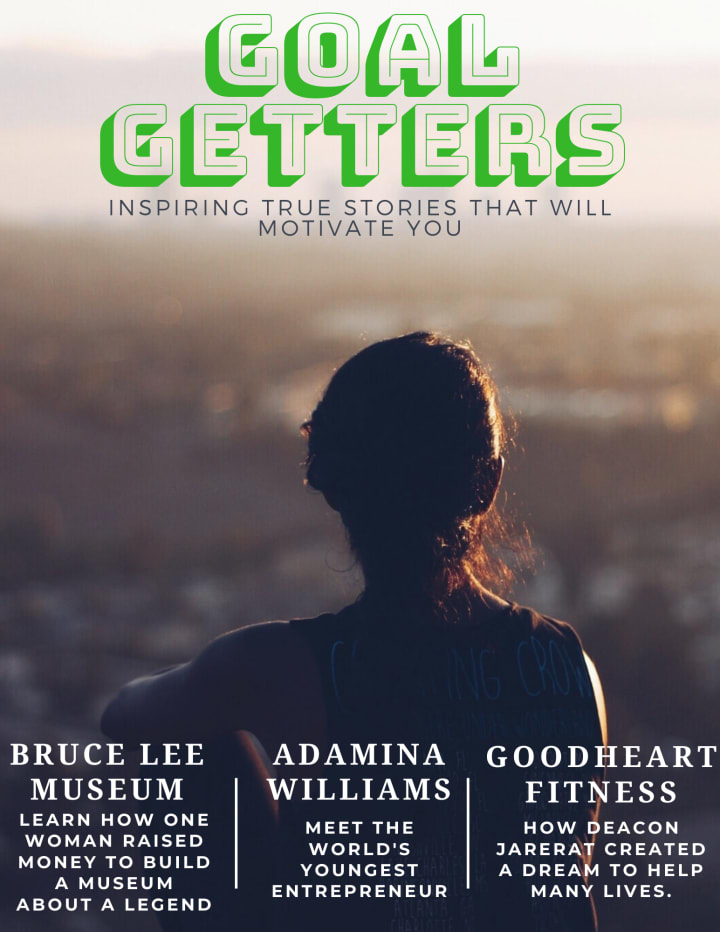
One of my favorites is editing photos for professional use. For example, let us just say that I am a layout artist and/or a graphic designer. There is a magazine called Goal Getters, and it includes inspirational stories about people’s accomplishments. If I am doing the cover of an issue, I would use a picture that resembles triumph – like maybe a woman looking over a mountain. I would add the title and subtitle of the magazine. In addition to that, I would highlight three major stories on the cover that would get the readers’ attention. Below is a class project I completed a few years ago.
You do not have to be a professional to do these types of photo editing. Realistically, anyone can give their photos a professional look. It all depends on what tools you use and how familiar you are with these tools. I discovered that if I am not familiar with a photo editing tool or software, I learn how to edit photos very well if I take the time to play around with the tool.
CREATING A BOOK COVER
A more advanced project that I want to demonstrate is turning an image into a book cover. As a writer, I would come up with creative ideas for a book cover. After writing a story, I would envision different images of the book cover for the story. Sometimes I would visualize a book cover in the middle of writing the story.
What is the book?
Let us say I am writing a story about an apocalypse in the year 2050, and it is titled Apocalypse 2050. On the cover, I am not going to be specific about this apocalypse. It could be a zombie apocalypse. Maybe the story is about an alien invasion. Maybe the apocalypse has something to do with nuclear weapons. Obviously, I would have the title and my name on the cover of this book. That has already been established.
Image?
I am considering using a photo on the book cover. However, this photo will not be plain – by the end of the project anyway. Will I start with a regular photo? Absolutely. On this book cover, I decided to use my children as the models.
Wait, why children?
I wanted to add children on the cover because the story involves two children. Who are these children? Are they villains? Heroes? Are they aliens from outer space? Are they zombie slayers? Are they zombies? When you view the book cover with a vague title and two unknown children, the story becomes a mystery - unless you look on the back and read the blurb. I want to let the readers know that this book is about two children engaged in an apocalypse in the year 2050.
Here is what I want the book cover to look.
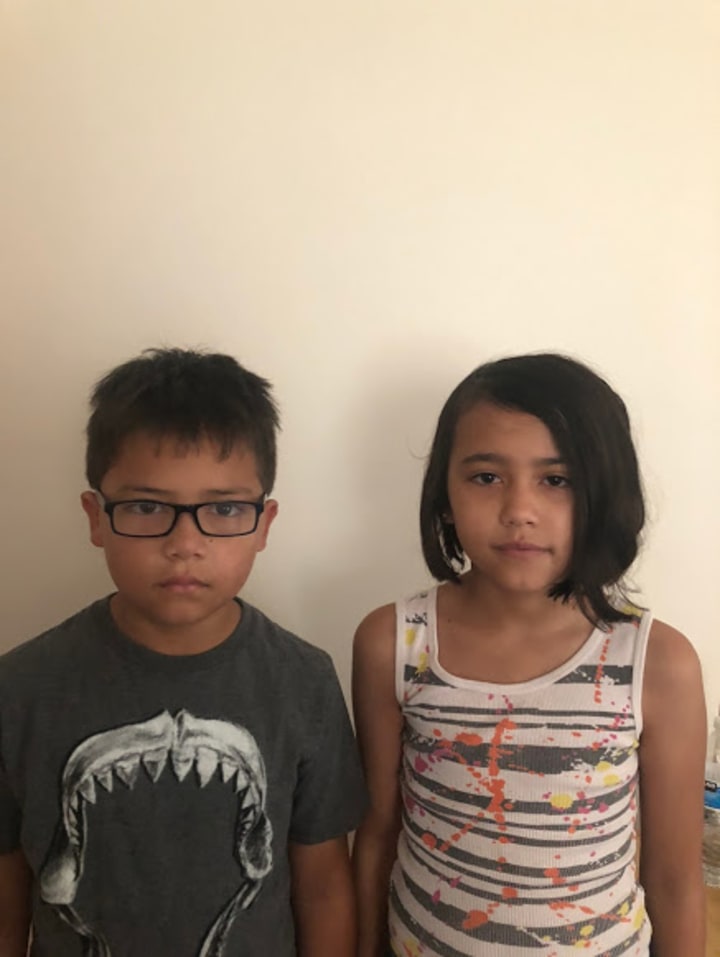
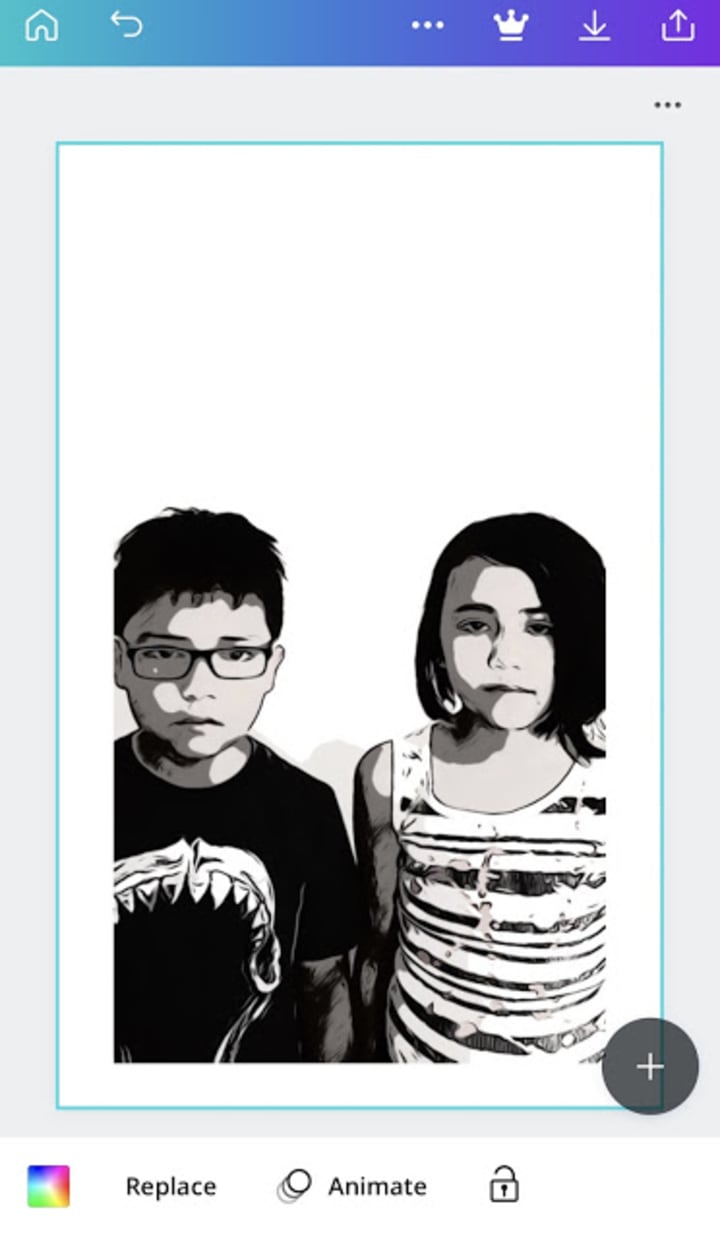
Original Photo
This is an actual photo of my children. I decided to use a plain, ivory color background. I had them look neutral instead of them smiling and saying, “Cheese!” Why neutral? I do not want the readers to know their emotions or what they could be thinking.
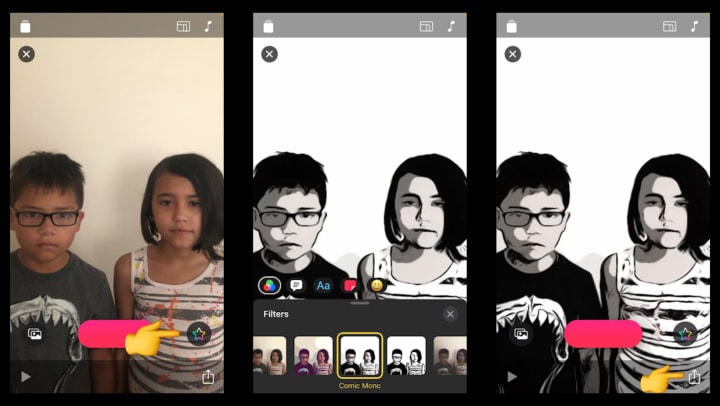
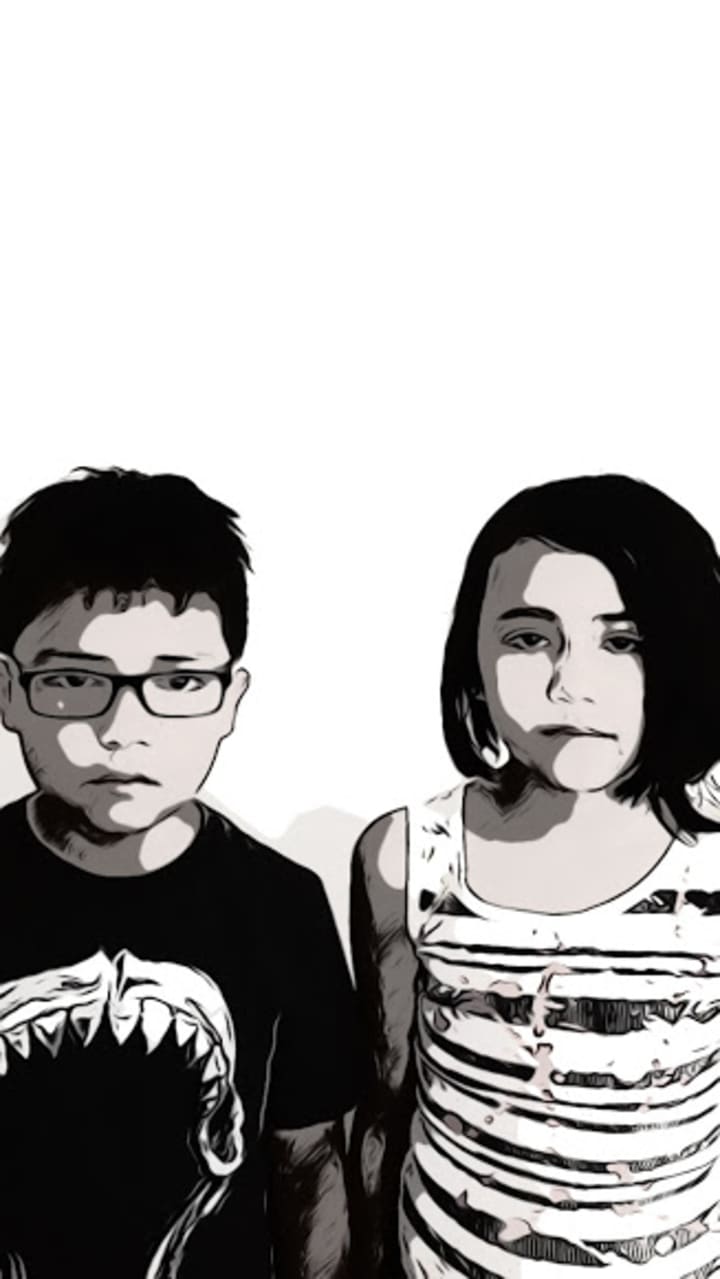
First Filter
Next, I wanted to change the filter of this photo to give it a comic book or graphic novel look. I chose this kind of filter because it gives the readers hints that the story may have adventures, heroes, and battles – like you would find in comic books. I decided to go with an app called Clips. The reason is the app includes a filter that I feel is best for this book cover.
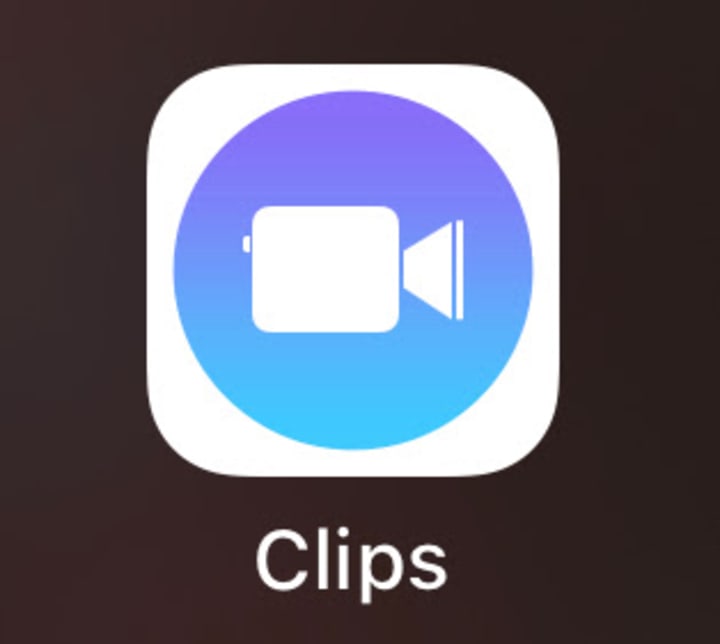
After I open the Clips app, I upload the original picture I want to use. If I click on the multi-color star on the right, a row of filters appears. Since I want to give the photo a comic book appearance, I would select Comic Mono. Once I change the filter, I save the image by clicking on the box with the up arrow.
Okay, I have my first filter. Now what?
Canva
There is a tool I enjoy utilizing if I want to edit photos and work on projects. It is called Canva. You can go to the site to use this tool, and there is also an app. Canva is a platform where you can create different projects. You can create logos, business cards, menus, calendars, tickets, CD covers, and many more. In fact, I actually used this platform for the Goal Getters magazine cover. Canva is free to use. They provide thousands and thousands of images and elements you can use in your projects. Some of the images and elements are free to use. The rest are not, which means you would have to subscribe to the Pro version for more options.
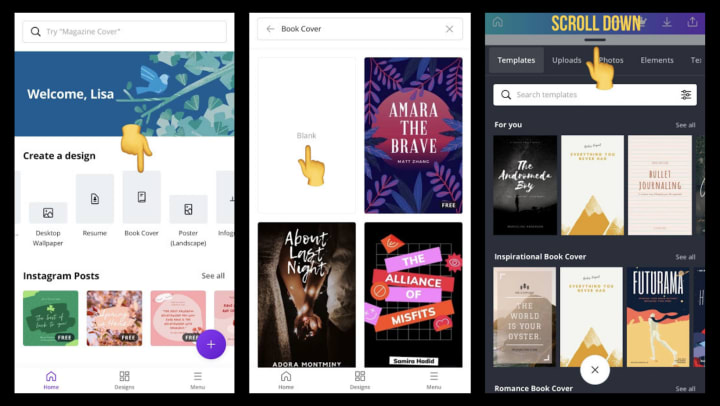
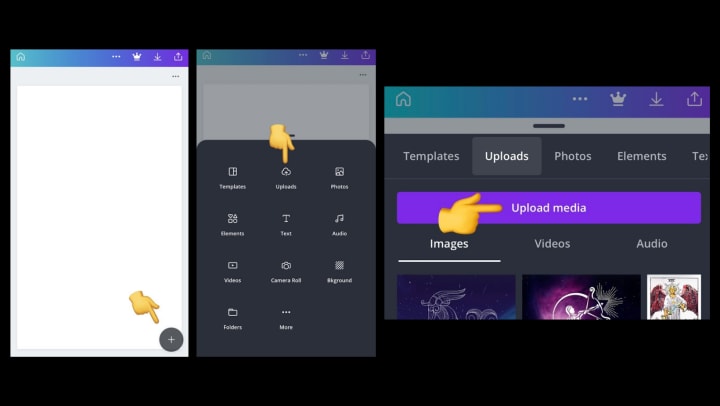
Now that I have my comic book looking photo, I am ready to go to the next step of making my book cover. By the way, I used the app version. After I log in Canva, obviously, I would select Book Cover for the project. Instead of choosing a designed template, I would open the Blank one. For some reason, more optional templates would appear. I guess it is their way of asking, “Are you sure?” In this case, I would click on the small bar on the top center and scroll down to open a Blank template.
Now that I have my Blank template opened, I am ready to pull the filtered photo that I just worked on. I click on the Plus icon on the bottom right side. This gives me the option to add something to the template. In this case, I would select Uploads and click on Upload media. After the photo I want has been uploaded, I am now ready to place it on the template.
What else?
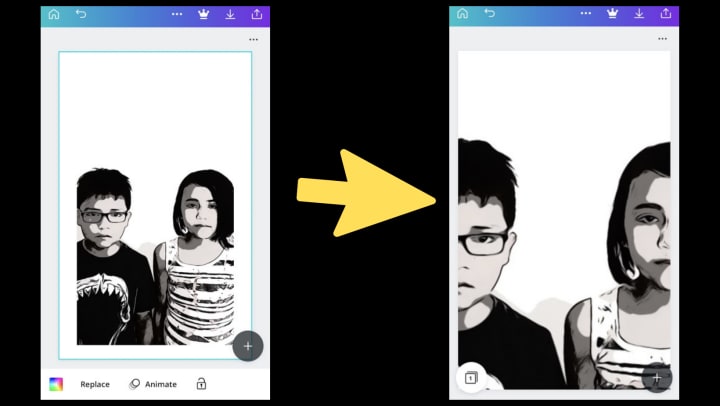
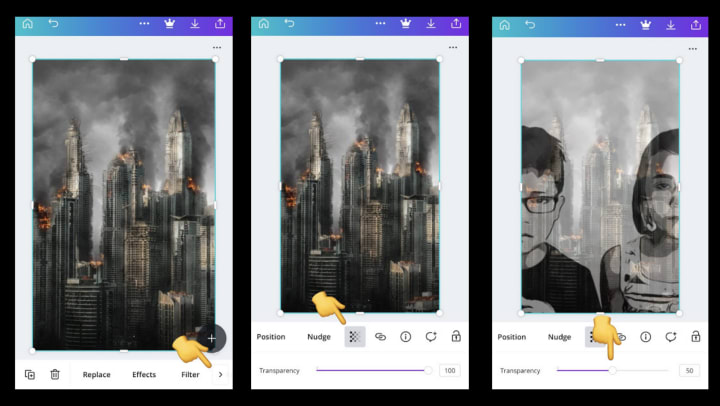
Okay, I have this whole photo on the book cover. However, I do not want to reveal everything in the photo – not even their whole faces. I decided to show just half of their faces. The reason is I want to make the children even more mysterious, leaving the identity of each child very enigmatic. It would be hard to tell if they are protagonist or antagonist. Even though their images are vague, I feel that this would make the importance of the children very bold. In order for me to show half of their faces, I would enlarge the photo accordingly.
How can we make this look apocalyptic?
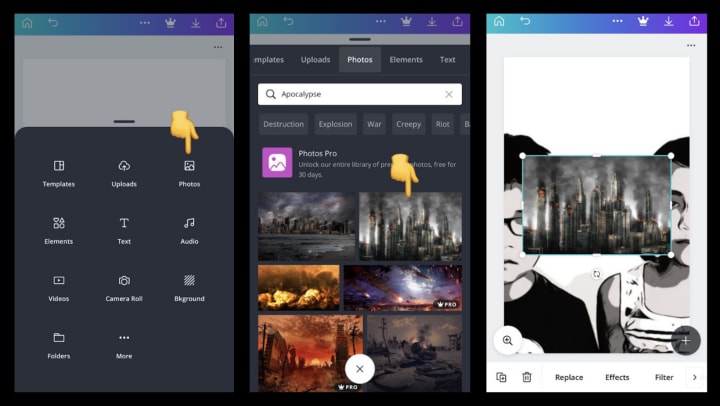
Since there is supposed to be an apocalypse in the story, I wanted to add an image that resembles chaos or calamity. I did not want to use my own image. It would be difficult for me to take a picture of something that shows some type of calamity anyway. Therefore, I decided to use a free image. After clicking on the same Plus icon, I selected Photos this time. I used a word to search for the kind of image I want. When I looked up the word “Apocalypse,” I found an image that would be perfect for the cover. It is an image of burning buildings. I selected the image, and it appeared over the filtered photo I uploaded.
How can we use both images on the cover?
Obviously, I want the cover to show the children and the burning buildings. Now, how can I do that? My idea is to make the images transparent. To me, using the transparent effect gives the readers the idea that the apocalypse or calamity is overpowering the minds of these two children. After I enlarge the apocalypse image, I click on the little arrow below the Plus icon, and more options on that row appear. Then, I select the Transparent icon. Below the icon, I change the transparency from 100 to 50. The transparent images of the children and the burning buildings are shown.
Almost done!
Now that I have all the images that I want to appear on the book cover, I am ready to add the text. After I click on the Plus icon, I select Text from the options. I prefer to use a pre-made text for my title. I felt that the Planet Arcadia text was appropriate for my title. I selected it and edited the text for it to read the title.
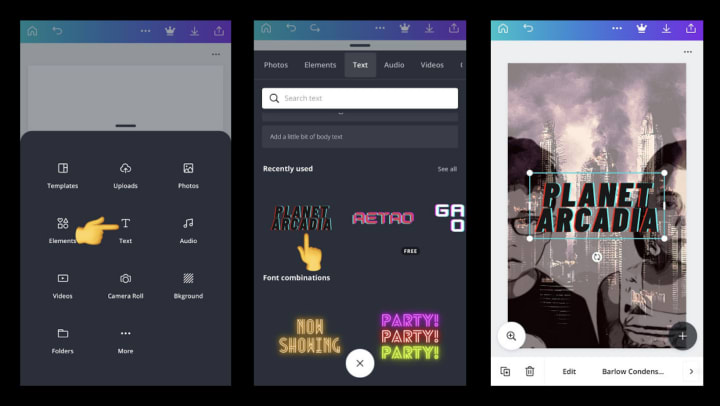
After I completed the title of the book, I went back to the Text option again. This time, I wanted to find something for the author’s name (me). For my name, I decided to go with the Open Sans Extra Bold font, so I clicked on the top Add A Heading option. I edited the text to my name and placed it on the bottom center.
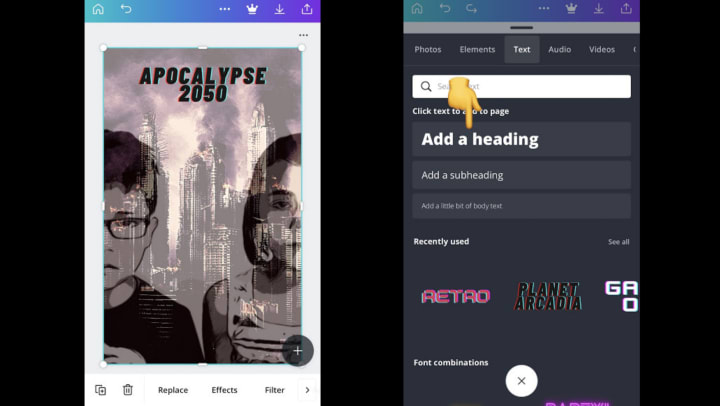
Complete Apocalypse 2050 Book Cover
The final project should look like this.

Final Thoughts
When I use Canva for my creative projects, I take pride in my work – whether it is for school, business, or just for fun. I love the opportunity of giving my project a professional look. It makes me wonder if other designs I have seen on business logos, flyers, greeting cards, shirts, brochures, and other templates were created on Canva. It is very possible because the designs you can create are endless. If they are familiar with Canva, companies and professions would not need to hire graphic designers for their businesses. I am not indicating that graphic designers would be out of business because of this platform. In fact, there are graphic designers who do take advantage of this tool and use it faithfully. Not all companies would have the time and patience to work on a design for their businesses. In my case, if I want to make a book cover for my novel, I can rely on this platform and would not have to pay a graphic designer hundreds or thousands of dollars to do the work. Photo editing is really not as complicated as it sounds. Even though it sounds like something only film productions would know, having fun with it – regardless of your age and profession – makes photo editing a lot easier than you realize.

About the Creator
Leona Valentine
Hi. I have been writing since I was a kid. After college, I published a poem called "Dark Heaven" in a book titled The Colors of Life. I love writing short stories, poems and more. I enjoy parenting, art, meditation, and martial arts.
Enjoyed the story? Support the Creator.
Subscribe for free to receive all their stories in your feed.
Keep reading
More stories from Leona Valentine and writers in Photography and other communities.
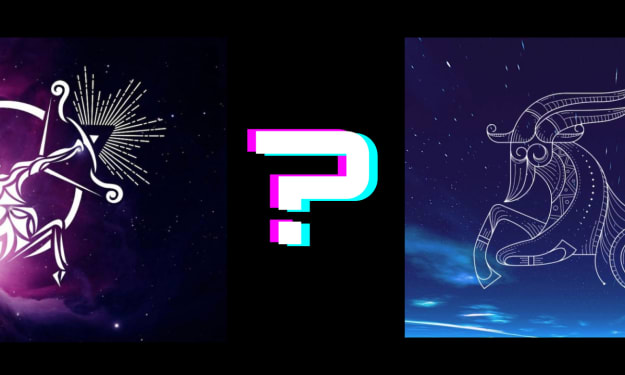
An Archer Or A Sea Goat
For a while, I have been struggling trying to figure out my true astrological sign. My birthday is on December 22nd. Since my birthday falls in the date range of a Capricorn, that would make me a Capricorn. Or am I really? One can assume that I am a Capricorn based on the birthday. But maybe I am not.
By Leona Valentine3 years ago in Futurism
The Magic of a Big Mound of Dirt
My stomach is tight. I haven't done this in a while. I light my first joint and fiddle with my camera even though it's already set up the way I like it. I ask the model about her day. The model is a friend of a friend. Her skin glows. She walks with a sense of coiled and casual power. She both does and doesn't know how beautiful she is. Her hair falls in soft curls. The white, linen dress she chose for our photoshoot tangles with her ankles in the wind. We slow down and scope out our first location: a tree next to the old Hooters of our hometown downtown.
By sleepy drafts19 days ago in Photography
Why I Love Using TikTok: A Deep Dive into My Passion for the Platform
The Ironic Draw of TikTok In the digital world, social media platforms are not only a means of staying in touch but also creative expressions and communities. Unlike other social media apps, TikTok is the space where you can share fun and catchy video to the world. TikTok has become more than just a time pass for me, it's now an outlet to satisfy my creativity needs, meet friends who thinks alike and most importantly grown in person. This is the reason why I am obsessed with TikTok and how its use have changed me in ways like never before to extent that it has become inevitable for my life.
By Sophia Harryabout 10 hours ago in Photography
Comments
There are no comments for this story
Be the first to respond and start the conversation.