
BEST ANTI-AGING FACE EXERCISES
Reduce Jowls, Laugh Lines & Eye Wrinkles

foreign
face lifting routine now before we get
started I just want to thank you all for
your lovely comments and feedback I do
read every single comment and I'm trying
my best to get back to all of them
I do have my not only my nan to thank
for introducing me to face exercises all
those years ago but also my mum as well
who is standing behind the camera today
and helping me
she really reinforced with me my whole
life to really love the Skin I'm In and
accept myself for exactly as I am and
I'm now not only trying to pass that on
to my own daughter but to all of you as
well so thank you so much again for
enjoying the workouts and doing them
alongside me today's routine we're going
to focus on the entire face and the neck
so sculpting firming lifting and really
making it a form of self-care as well
now before we get started make sure that
you add your moisturizer or your facial
oil I'm just using an Aussie Aussie made
jojoba oil I always stick to your hoba
or rosehip oil before my routine so make
sure you add a couple of pumps to your
neck and to your face and we're going to
get started
place the left fingers under the right
collarbone and turn the head towards the
left shoulder create an underbite until
your head back at a 45 degree angle to
create length through the right side of
the neck straighten the neck and turn
your head back to the center
keep repeating and place the bottom
teeth forward of the front teeth tilt
the head back to feel a lengthening
sensation right through that right side
of the neck
and then you're going to just tilt your
head back and come back to the center
and keep repeating on that right side
now this movement simultaneously
stretches and strengthens the scalene
and sternocleidomastoid muscles of the
neck
this position creates length through the
muscle whilst the action of tilting and
lifting the head with a forward jaw
position creates strength and tone
throughout this entire area
make sure you hold that stretch for just
about five seconds or so to really feel
that sensation
right through the side of the neck
we're now going to repeat that on the
other side so place the right fingers
now under the left collarbone and turn
the head towards the right shoulder
create that under bite and tilt your
head back at a 45 degree angle to create
a length through the left side of the
neck
straighten the neck and then turn your
head back to the center
now keep repeating on that left side but
place the bottom teeth forward of the
front teeth and tilt the head back to
feel that lengthening before returning
back to the center keep repeating
placing the bottom teeth forward of the
front teeth and tilt the head back to
feel that lengthening before returning
back to the center
alongside the toning benefits this
action decreases neck stiffness and pain
and also reduces the risk of acute
muscle strain injuries in the future
flexibility and strength are both
integral to the health of your muscles
we're now moving on to the cheek
sculptor so gently pull the face back
with the index fingers and place the
ring fingers along the nasolabial lines
press your lips firmly together and then
try to smile pressing your lips together
throughout
you'll feel this working in the cheeks
in particular the buccinated muscles
which are responsible for providing the
cheeks with their structure and their
firmness
this will provide a really nice lifting
effect and sculpt the cheeks
we're going to repeat that exercise once
again
so again we're gently pulling the face
back with the index fingers and placing
the ring fingers along the nasolabial
lines pressing those Loops firmly
together and then trying to smile
pressing your lips together right
throughout the entire exercise and
almost trying to press the corners of
your mouth up into the resistance of the
ring fingers the placement of the
fingers not only stops wrinkles from
forming especially those nasolabial
folds but it also provides extra
resistance to press up into to really
maximize the results of this exercise
lift
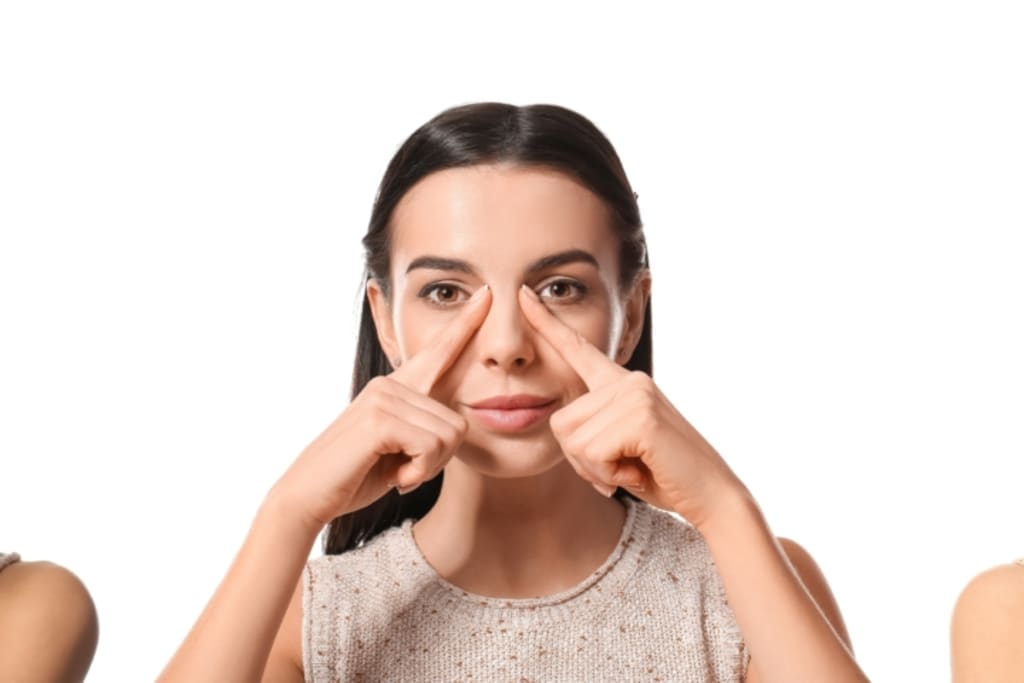
so once again we're gently pulling the
face back with the index fingers and
placing the ring fingers along those
nasolabial lines
we're going to open the mouth into an O
shape and wrap the lips over the teeth
send your gaze up towards the ceiling as
far as you can without creasing the
forehead you'll feel this working the
muscles underneath the eyes namely the
orbicularis oculi muscles and the
zig-o-matic muscles this naturally firms
and lifts the under eye area and
provides shape and structure
now we're going to do that once again
so we're going to gently pull the face
back with the index fingers very lightly
and then place the ring fingers along
those nasolabial lines opening up the
mouth into an O shape and wrapping the
lips over the teeth and sending that
gaze up to the ceiling as far as you can
remembering not to crease the forehead
not only is this a great move for
reducing the lines and sculpting muscles
but it also helps reduce puffiness and
under eye bags by improving blood flow
and circulation to this area
foreign
lift so using your fingers above each
eyebrow to gently lift the forehead
you're then going to look down as far as
you can creating a firming sensation
across the eyelids now keeping the Gaze
as low as possible looking from left to
right like a pendulum the orbicularis
oculi muscles surround the entire eye so
we're once again working on
strengthening these muscles with a
particular focus on the eyelid area
firming lifting and opening the eyes and
this also strengthens weak eye muscles
for sharper vision
we're now moving on to our binoculars
you're going to place your thumbs along
the orbital bone and your index fingers
above your eyebrows gently open up the
eye area with your fingers and open the
eyes as wide as you can without creasing
your forehead pressing up into the
resistance of the fingers keep the eyes
wide open as much as you can right
throughout
really engaging those muscles
this works the frontalis muscles in the
forehead as well as the orbicularis
oculi muscles again it helps train the
muscles to be as strong and static as
possible despite our regular facial
movements achieving the same effect as
Botox however instead of weakening and
freezing the muscle we are strengthening
and training it
and we're going to repeat that again
place your thumbs along the orbital bone
and your index fingers above your
eyebrows gently opening up the eye area
with your fingers and opening the eyes
as wide as you can without creasing the
forehead pressing up into the resistance
of those top fingers keeping the eyes
wide open
creating strong lifted muscles in the
upper portion of the face will give your
entire face an overall lifted refreshed
appearance
all right
and now for our forehead release
so place the heel of your left hand
directly above your left eyebrow and
press firmly wiggle your hands slightly
before running it up towards the
hairline releasing tension from the
forehead keep repeating this shifting
your position slightly each time to
cover the entire left side of the
forehead
this releases tension in the forehead
muscles the frontalis muscles and
significantly reduces expression lines
we need both strength and flexibility
once again in our muscles to have them
looking and performing at their optimal
level
now let's repeat that on the other side
place the heel of your right hand
directly above your right eyebrow and
press firmly wiggling your hands
slightly before running it up towards
the hand line releasing tension from the
forehead keep repeating this shifting
your position slightly to cover that
right side of the forehead
if you suffer from tension headaches
this is an excellent exercise you can
incorporate into your day at regular
intervals to really help prevent them as
much as possible
just like tight muscles in the body can
cause joint injuries tight muscles in
the face can also cause headaches and
tension
coming up to our face sculpting movement
place a blade of the hands directly
beside the nose and lips and with a
lifting motion Glide the hands up and
out towards the ears we're going to keep
repeating this motion this is a great
exercise to finish off our session as it
assists with lymphatic drainage moving
the toxins and fluid towards the
drainage points located right in front
of the ears so not only have we
strengthened and toned the muscles of
the face we've also gently released with
massage and perform some lymphatic
drainage for a nice well-rounded and
effective routine nice gentle gliding
and smooth movements right throughout
just pressing as firmly as you feel
comfortable
and that brings us to the end of our
session
thank you so much for joining me for
this face lifting routine make sure that
you like subscribe and turn on
notifications so that you don't miss any
of our exercises I look forward to
seeing you at the next one
About the Creator
Sen Sab
Join me in exploring the extraordinary in the ordinary, and let's dive deep into the realms of imagination and understanding together
Enjoyed the story? Support the Creator.
Subscribe for free to receive all their stories in your feed. You could also pledge your support or give them a one-off tip, letting them know you appreciate their work.
The Art of Work: Valuing Time in the Age of AI
Artificial intelligence isn't going away. You might be excited about that. You might be anxious. Whatever you're feeling, though, AI has become a permanent fixture in our society. As long as there's profit to be made, advancements in AI will shape the next wave of technology.
By Addison Horner21 days ago in 01
Types of Machine Learning Algorithms Explained: A Guide for the Data Science for Managers Course
As managers entering into the field of data science, it's pertinent to learn about different types of machine learning algorithms. These algorithms are actually at the heart of data-driven decision-making or predictive analytics. In this series of blogs, we will discuss various kinds of machine learning algorithms and their application, and explain their relevance to our Data Science for Managers course.
By Fizza Jatniwala3 days ago in 01


Comments (1)
Interesting. Your lesson will be easier to follow if you provide illustrations—maybe pictures or some form of sketch. Consider including them next time. Good job.